Create sticky notes and tags
Working with sticky notes and tags
Miro’s REST API 2.0 supports the major functions of sticky note and tag creation and management. This consists mainly of the available CRUD methods (create, read, update, delete), as described in our reference documentation.
Sticky notes and tags are a great way to organize associated data points on a Miro board in a flexible visual manner. Sticky notes and tags are technically two separate items in Miro, despite the fact that they’re often used in conjunction with each other.
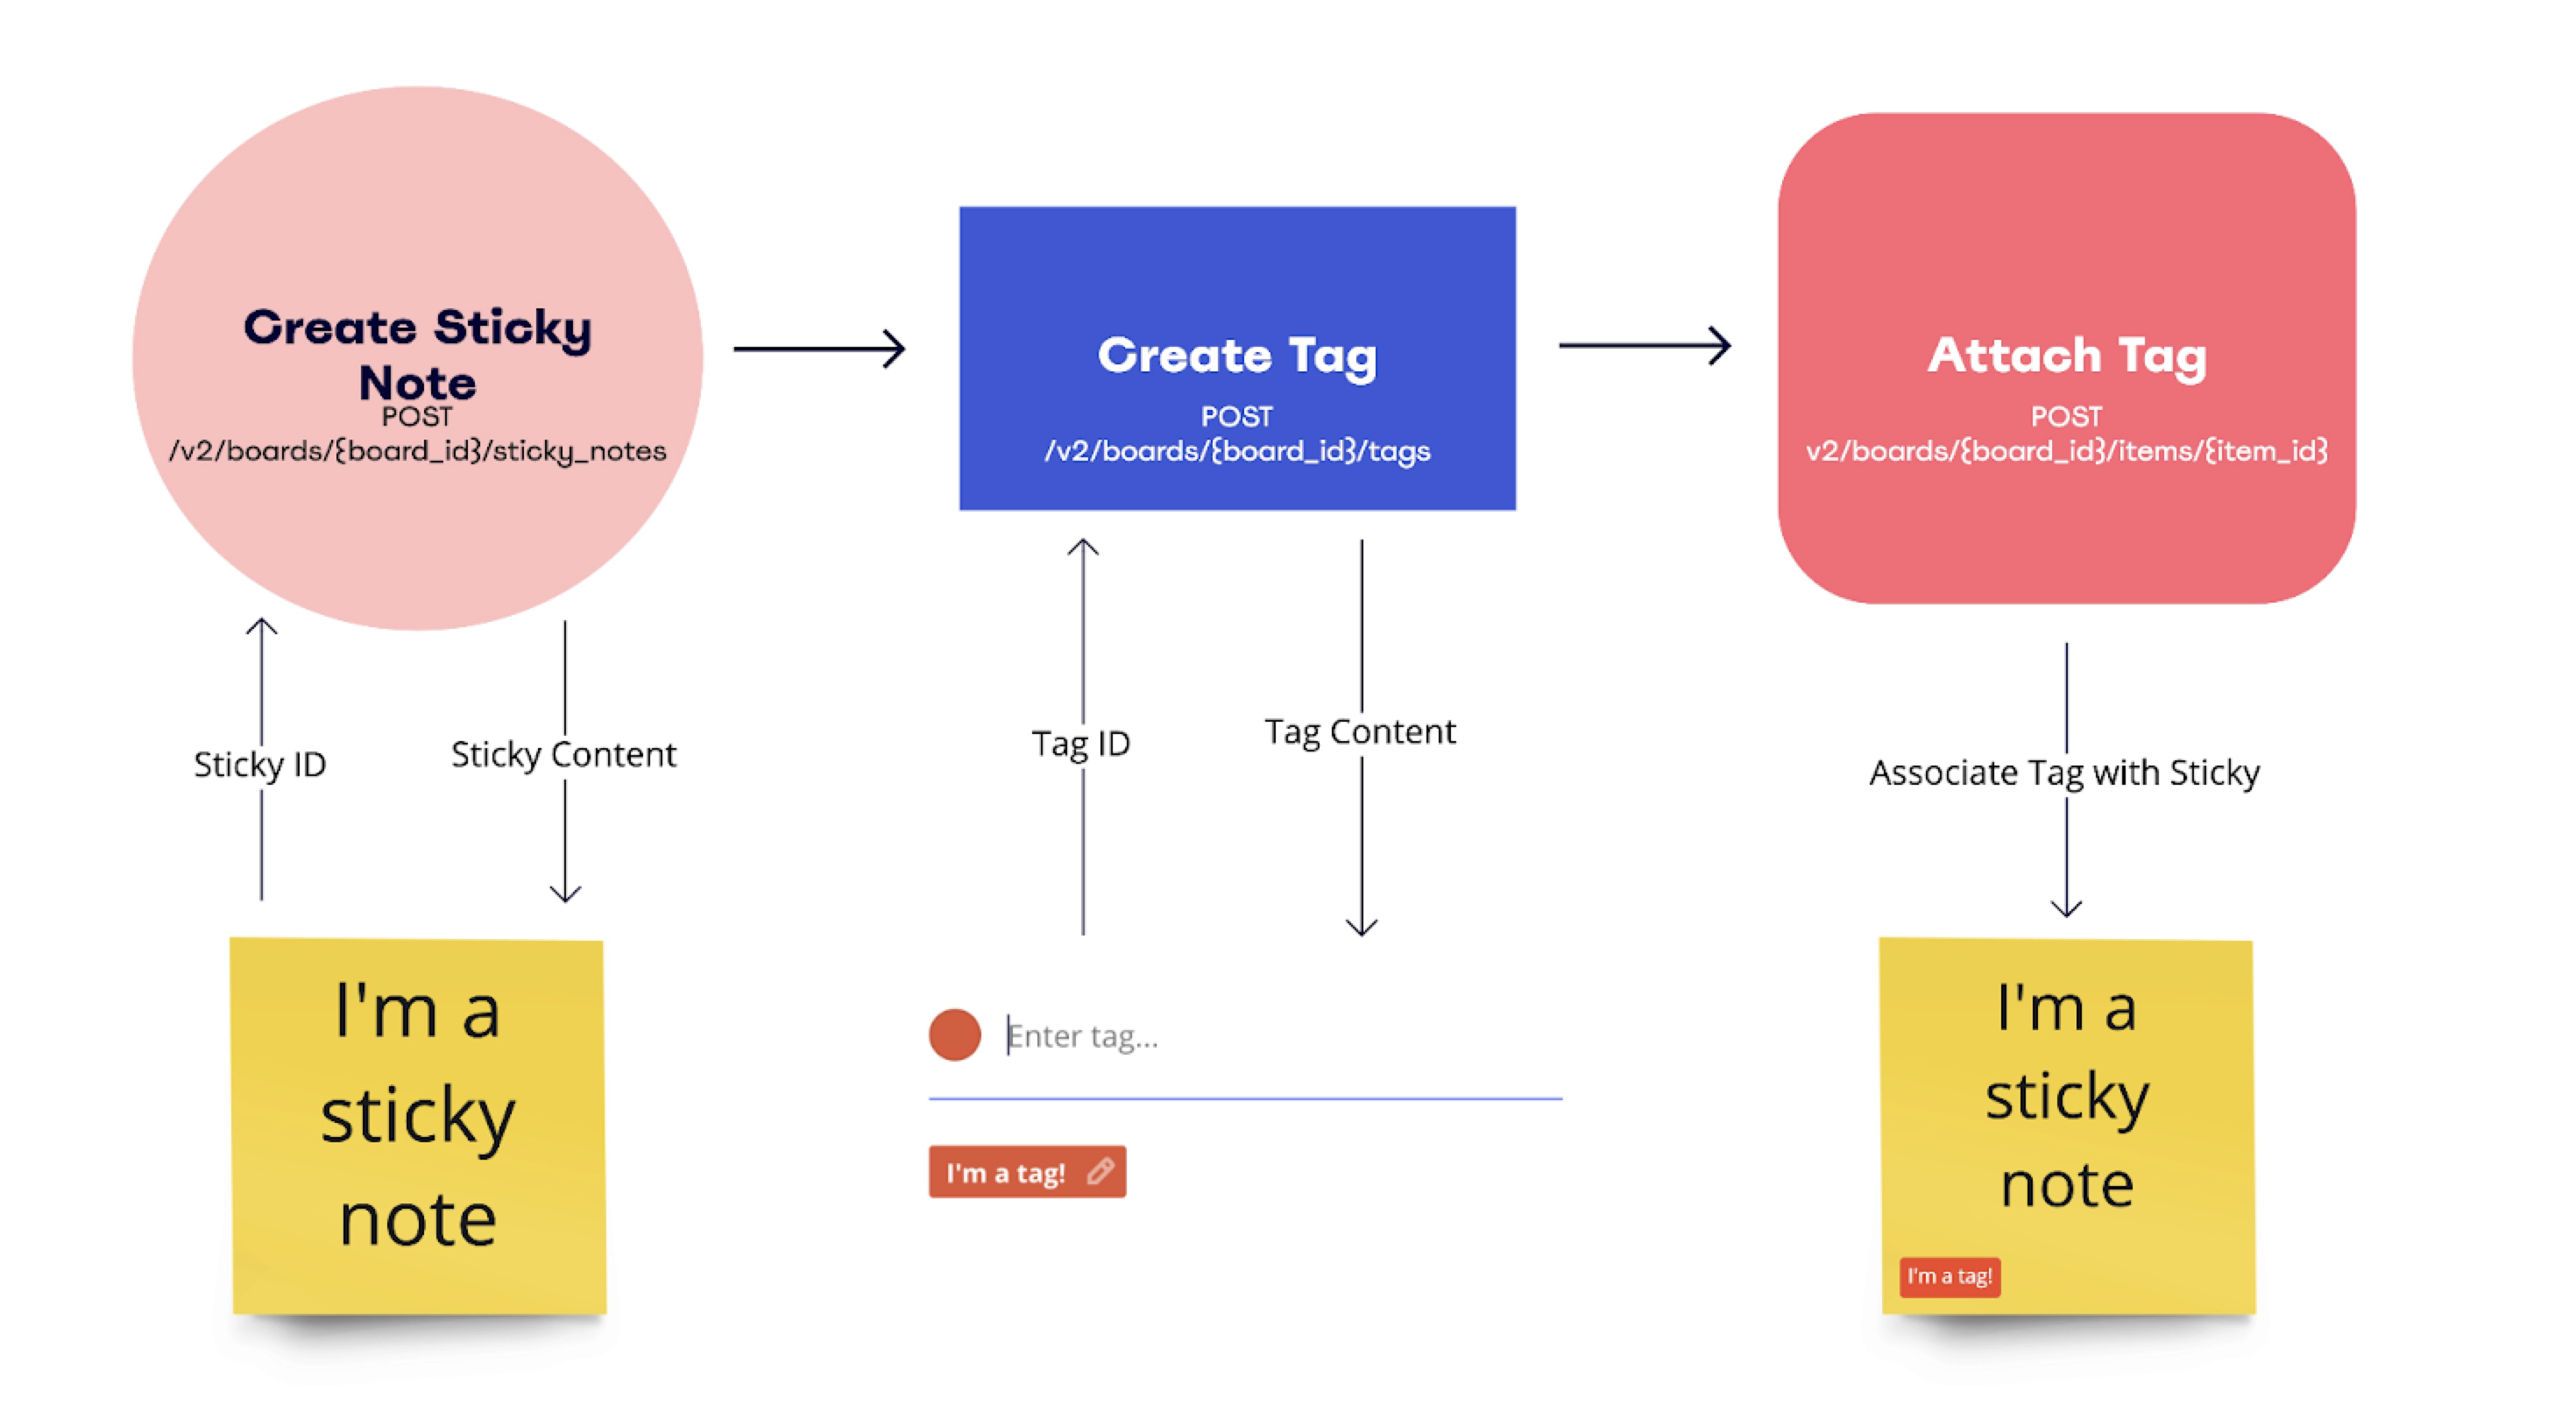
To leverage sticky notes with tags, you need to create a sticky note, a tag, and then you need to associate the tag to the sticky note.
Create the tags and the sticky notes that you want to associate to each other by specifying the same boardId. It's not possible to associate sticky notes to tags created in a different board.

Figure 1. The workflow: create a sticky note, create a tag, attach the tag to the sticky note.
Step 1: create a sticky note
First, create a sticky note by sending a POST request to the sticky note endpoint.
The API response includes an id for the sticky note: save it, as you'll need it to associate the tag to the sticky note in a later step.
// Using miro-api client library
import { MiroApi, ShapeItem } from "@mirohq/miro-api";

const api = new MiroApi(oauthAccessToken)

const board = api.getBoard(boardId)

const sticky = await board.createStickyNoteItem({
  data: {
    content: "I'm a sticky note",
    shape: "square",
  },
  style: {
    fillColor: "light_yellow",
    textAlign: "center",
    textAlignVertical: "top",
  },
  position: {
    x: 0,
    y: 0,
  },
})
Step 2: create a tag
Next, create a tag item on the same board by sending a POST request to the tag endpoint.
The API response includes an id for the tag: save it, as you'll need it to associate the tag to the sticky note in a later step.
// call createTag method to create the tag on a board
const tag = await board.createTag({
  fillColor: "red",
  title: "I'm a tag!",
});
Step 3: attach the tag to the sticky note
Last, once you’ve created a sticky note and a tag, you can associate them with each other by sending a POST request to the attach tag to item endpoint, where you specify the IDs of the sticky note and the tag.
// sticky note item provides the attachTag methods to add the id
await sticky.attachTag(tag.id)
For a full code sample, check out our REST sticky notes with tags sample app, where we explore these capabilities, as well as a CSV import function, in detail.
Working with sticky notes and tags in real-time with the Web SDK
While the REST API supports creation and management of tags, this use case may be best suited for scripts (or other background jobs) where it may not be necessary to propagate changes immediately.
Tags created and associated with a sticky note via API require a board refresh to be reflected on sticky notes.
For real-time support of tag association, use the Web SDK and the methods below.
To manage sticky notes and tags in real time, you can leverage the following Web SDK methods.
createTag()
// Create a tag
const todo = await miro.board.createTag({
  title: 'todo or not todo, that is the question',
  color: 'yellow',
});

createSticky()
// Create a sticky note and attach the tag to it
const stickyNote = await miro.board.createStickyNote({
  content: "sticky note with tag: 'todo'",
  tagIds: [todo.id],
});
Further exploration: deep dive with our REST sample app
While this guide is great for understanding the overall flow for working with sticky notes and tags, we encourage you to check out our REST sample app for further exploration.
This Node.js sample app uses server-side rendering (Handlebars.js) to provide a lightweight, CRUD-oriented REST example in the browser for Miro's sticky notes and tags APIs. It demonstrates a structured to unstructured use case via CSV import, creating Miro sticky notes with tags based on CSV data.
You can find more details and setup instructions in the project’s README.
See also
- Basic concepts about sticky notes
- Basic concepts about tags
- REST API reference documentation about sticky note endpoints
- REST API reference documentation about tag endpoints