Monetization with Miro + Stripe
Although the Miro Developer Platform doesn’t currently offer a native monetization solution, there are ways to leverage third-party capabilities to help you build your business on Miro. This way, you can meet the needs of Miro users looking to take advantage of your app or integration at a premium.
This guide will show you how to integrate with the payment processing platform Stripe, so you can receive payments for your Miro apps.
- Integrate your Miro app with Stripe
- Example use cases
- Learn more about monetizing Miro apps
Integrating your Miro app with Stripe
While there are many third-party payment processors available, Stripe provides easy-to-use REST APIs that make integrating your apps quite seamless. However, there are a few prerequisites you must complete.
Stripe integration prerequisites:
- You have a Stripe account
- You’ve created a payment link in Stripe
- You’ve generated API credentials in Stripe
With these prerequisites completed, you can start leveraging the power of Stripe to create a paywall within your Miro app. Now let’s explore the Miro monetization example app.
Adding a Stripe paywall to your Miro app
To help illustrate how you can leverage Stripe to add a paywall to your Miro apps, we’ve developed an example app that implements a basic Stripe integration. You can find the open source repo on our GitHub:
Monetization with Stripe
About our example app
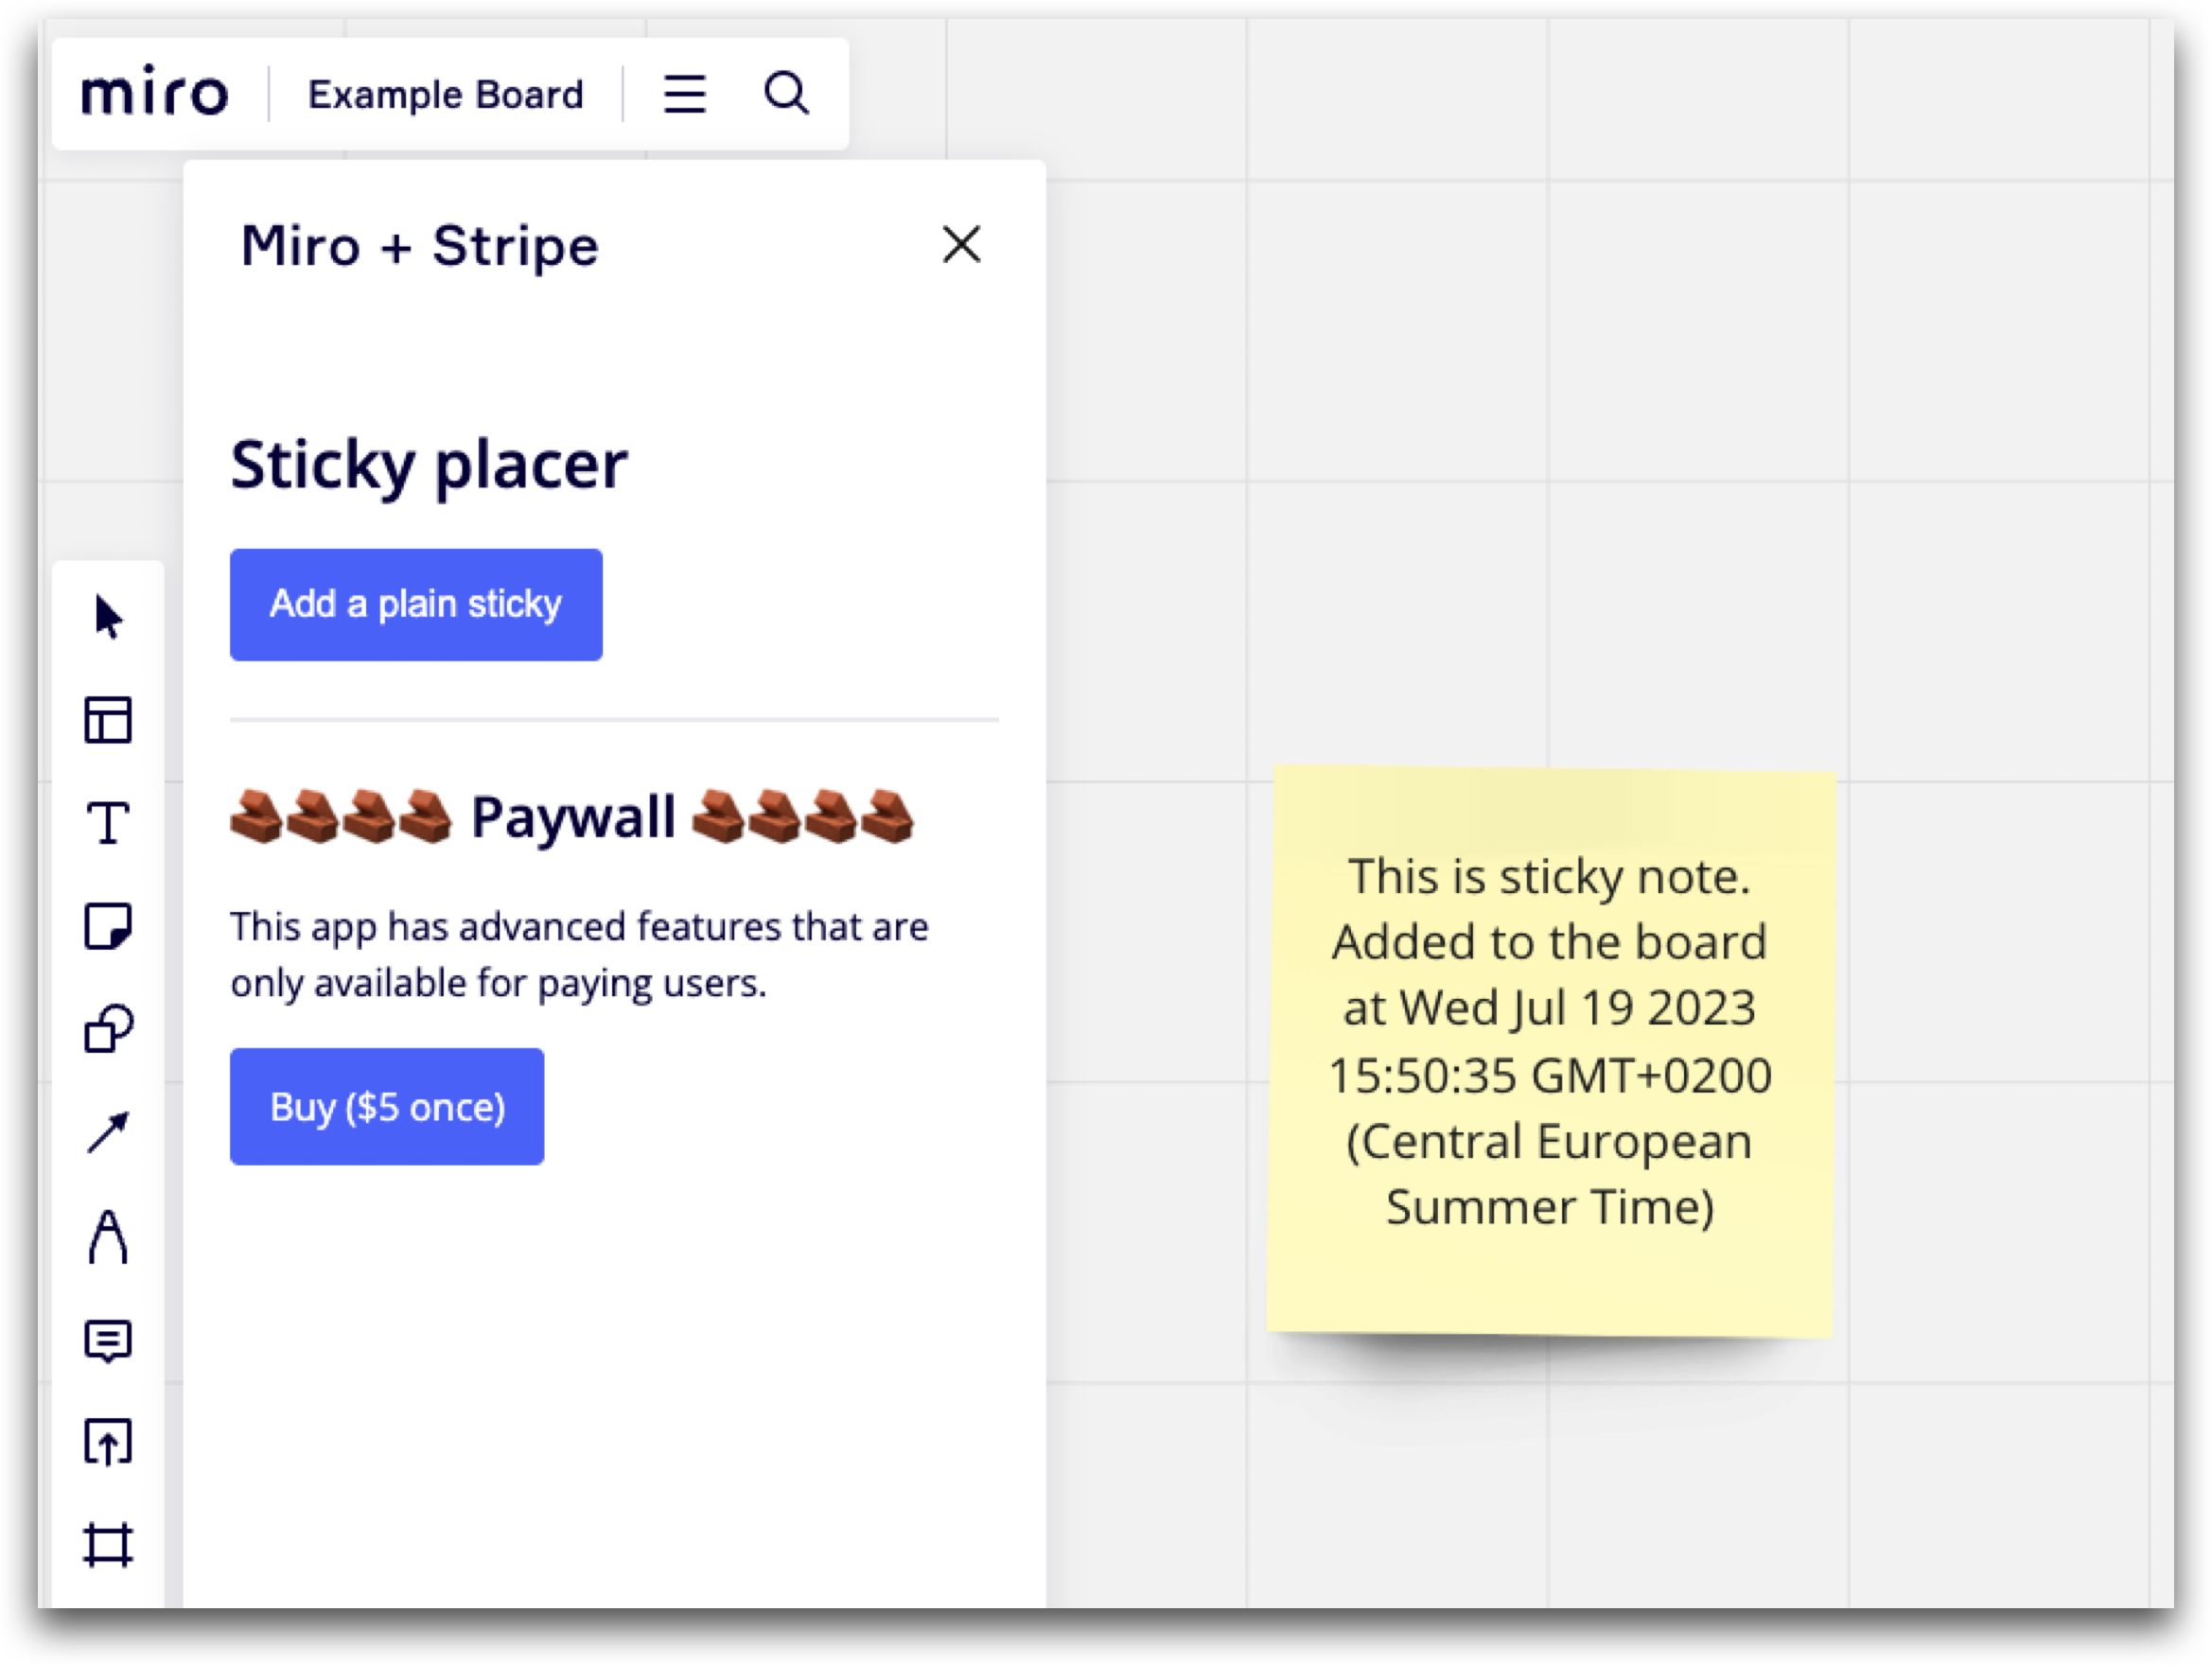
Our example app covers the basic use case for a one-time payment in order to access a premium feature of the app. In this example, users can access the app’s free capability by default — creating simple, yellow sticky notes on the board:

Figure 1. Miro + Stripe example app UI
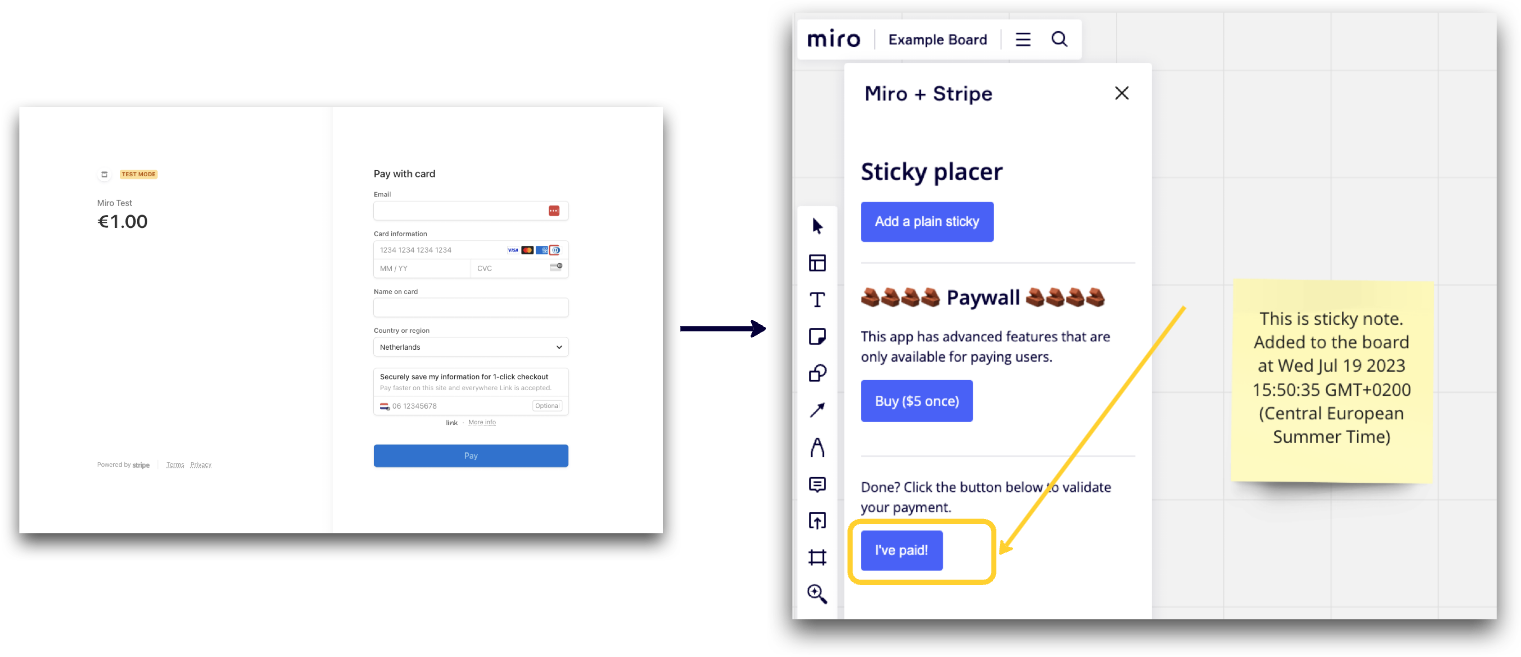
However, in order to use premium features, users will need to click Buy and make a payment:

Figure 2. Miro + Stripe example app, purchase flow
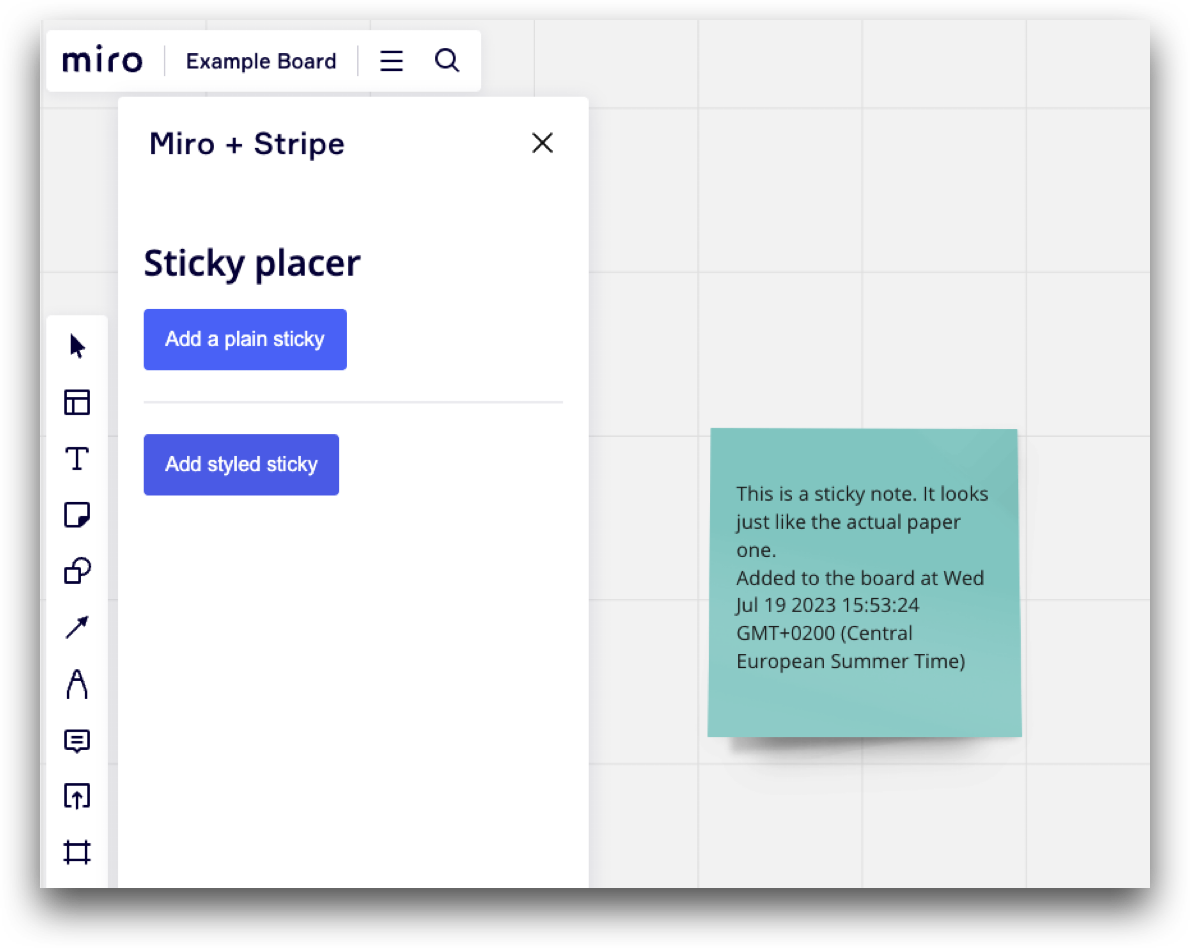
Once a user confirms their payment, they have access to “styled sticky notes,” (in this example, it’s simply a different color once you’ve paid):

Figure 3. Miro + Stripe example app, premium feature
Run the app
To get the example app up and running, follow these steps:
- Read the README.md in the root folder of the project
- Handle the prerequisites in Miro
- Handle the prerequisites in Stripe
- Update the
.env.examplefile in the example app with the credentials for both platforms, and rename it to.env. - Generate a test payment link in Stripe
- Copy the link from Stripe

- Update the link in the variable
paymentLinkincomponents > PaywallNotice.tsxin the Miro example app - Create a webhook endpoint in Stripe (test in a local environment) and download the Stripe CLI tool:
Brew install stripe/stripe-cli/stripe
- From your terminal, run:
stripe loginstripe listen --forward-to localhost:3000/api/payment-handler- Copy the webhook signing secret from console output and paste it into the variable in your
.envfile in the Miro example app
- From the root folder of the app, run
touch store.json && echo '{}' > store.json - Run
npm installto update packages - Run
npm startto run the app
Important
Payment links in Stripe under an active account will charge end users based on your Stripe product configuration. During development, make sure you’re using a test payment link in Stripe to ensure no real transactions occur unintentionally. Read more in the Stripe Test Mode documentation.
Example use cases
While our monetization example app implements a paywall in order to access premium features, this is just one example of how you can leverage Stripe to collect payments for your Miro app. Some common payment use cases could include one-time payments for access to the app, recurring subscription fees for continued access to the app, or implementing gated or consumption-based features.
Associating Miro users with Stripe licenses
If you're using the Web SDK, you can call the
getUserInfo()method to retrieve a user's unique Miroidafter the initialization of the app.This unique user
idcan be used to create a mapping between Miro users you've verified as having licenses in your stripe instance.
One-time payments
For an easy, basic implementation of monetization, you can add a paywall to your app, similar to a login requirement. This would require users to make a one-time payment in order to access your application.
Subscription payments
Subscription payments are a great option for apps that you believe users will want to utilize on a regular basis. You can manage this setup directly in your Stripe configuration.
Freemium model
Many apps implement a “freemium” model, in which users can experience a subset of features and capabilities prior to committing to a payment or subscription.
This model is a common pattern across third-party applications on the Miro Marketplace, and has shown to be successful in attracting users and converting them to paid customers.
Gated features and consumption-based payments
Maybe your app has basic functionality that you don’t wish to charge for, but you do want to offer users the option to pay for premium features that go a bit above and beyond your app’s basic functionality.
You can consider implementing certain features behind a paywall, such that when users attempt to click a certain button or take a specific action to use a particular feature, payment is required.
Similarly, if your app is leveraging an additional third-party tool or integration that incurs an expense, you can consider transferring some or all of these costs to your end users. For example, if you leverage an API that incurs costs per usage, you could implement a paywall that appears for users only once they’ve taken a certain number of actions (or made a certain number of requests through your app).
Learn more about monetizing Miro apps
If you’re interested in learning more about monetization and Miro apps, check out how one developer implemented monetization with Miro and Stripe:
Blog: Building and monetizing Miro apps
You can also find examples of apps on the Miro Marketplace that implement monetization, such as SuperSearch or Easy Translator.